Expand Filesystem
If you find that the free space of the raspberry pi SD card or eMMC is smaller than the capacity of the actual SD card or eMMC, you need to do the following to expand the raspberry pi. If you find that the system does not have the raspi config tool, you can use Method 2 (use the GParted partition tool).
Method 1: Use raspi-config tool
If you are using a mirror after June 2023 and have added a third read-write partition, this method is no longer applicable. Please refer to method 2 and method 3.
1. Open raspi-config.
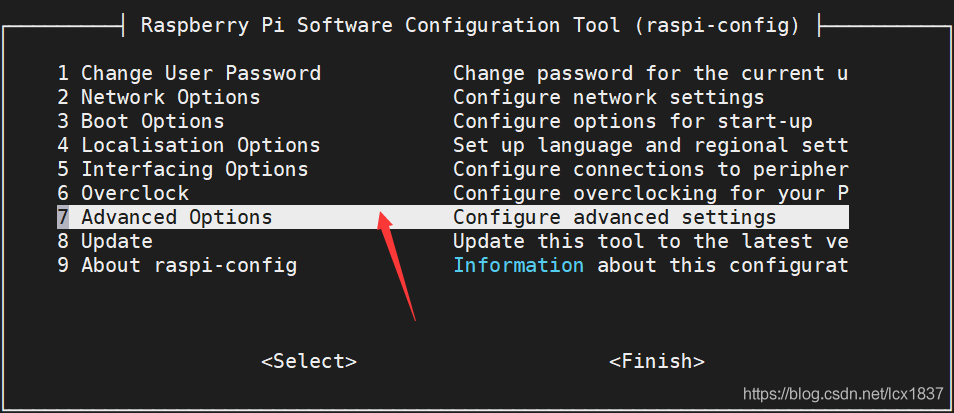
2. Choose Advancd Options:
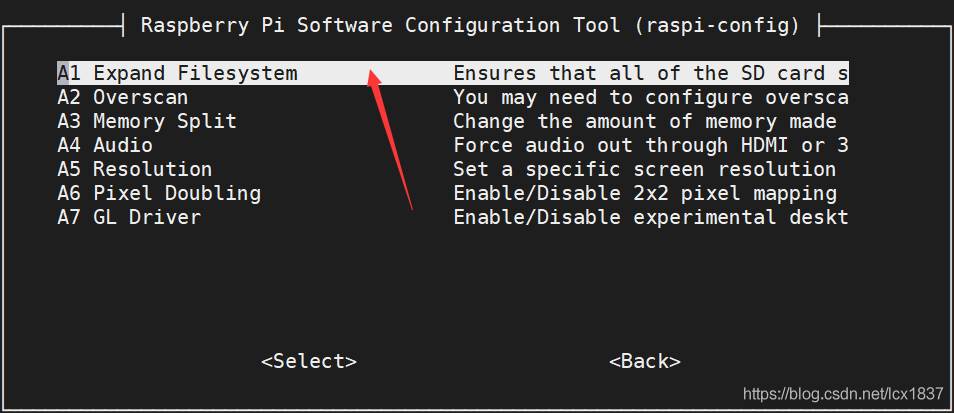
3. Choose Expand Filesystem:
4. Ok:
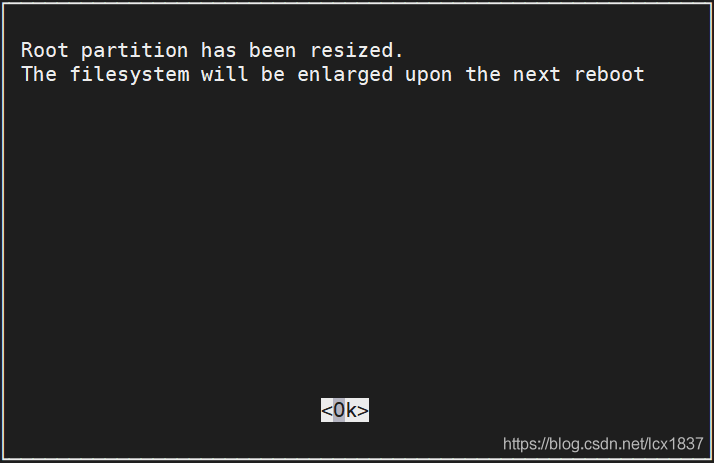
5. Execute the command resize2fs /dev/mmcblk0p2 in the terminal to see that the SD card has been successfully expanded.
Method 2: Use GParted tool
1. Connect the SD card or EMMc that has burned the image to the computer through USB. Take the GParted partition tool on Linux as an example. Other platforms also have similar partition tools.
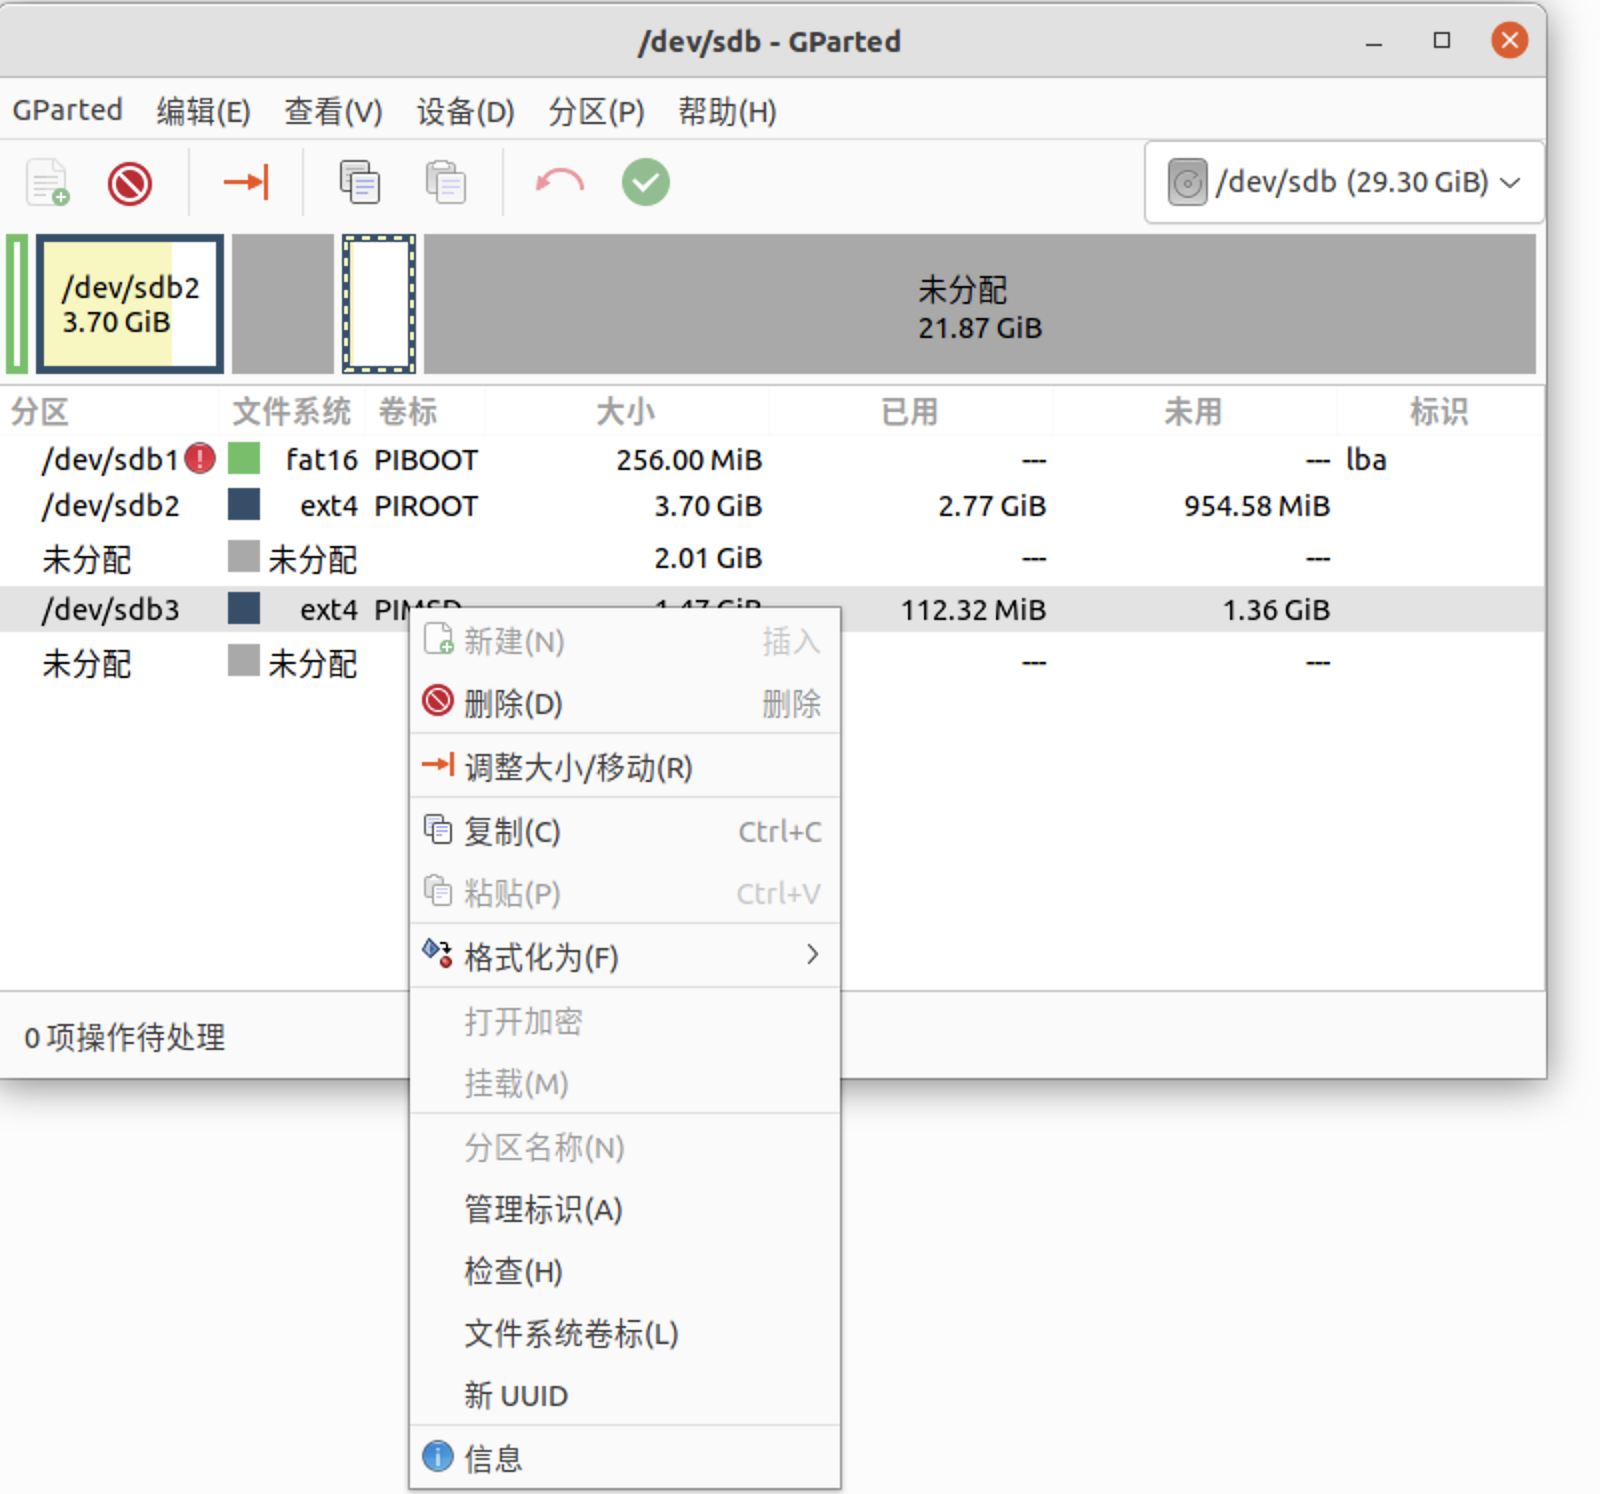
Open GParted software and select SD card:
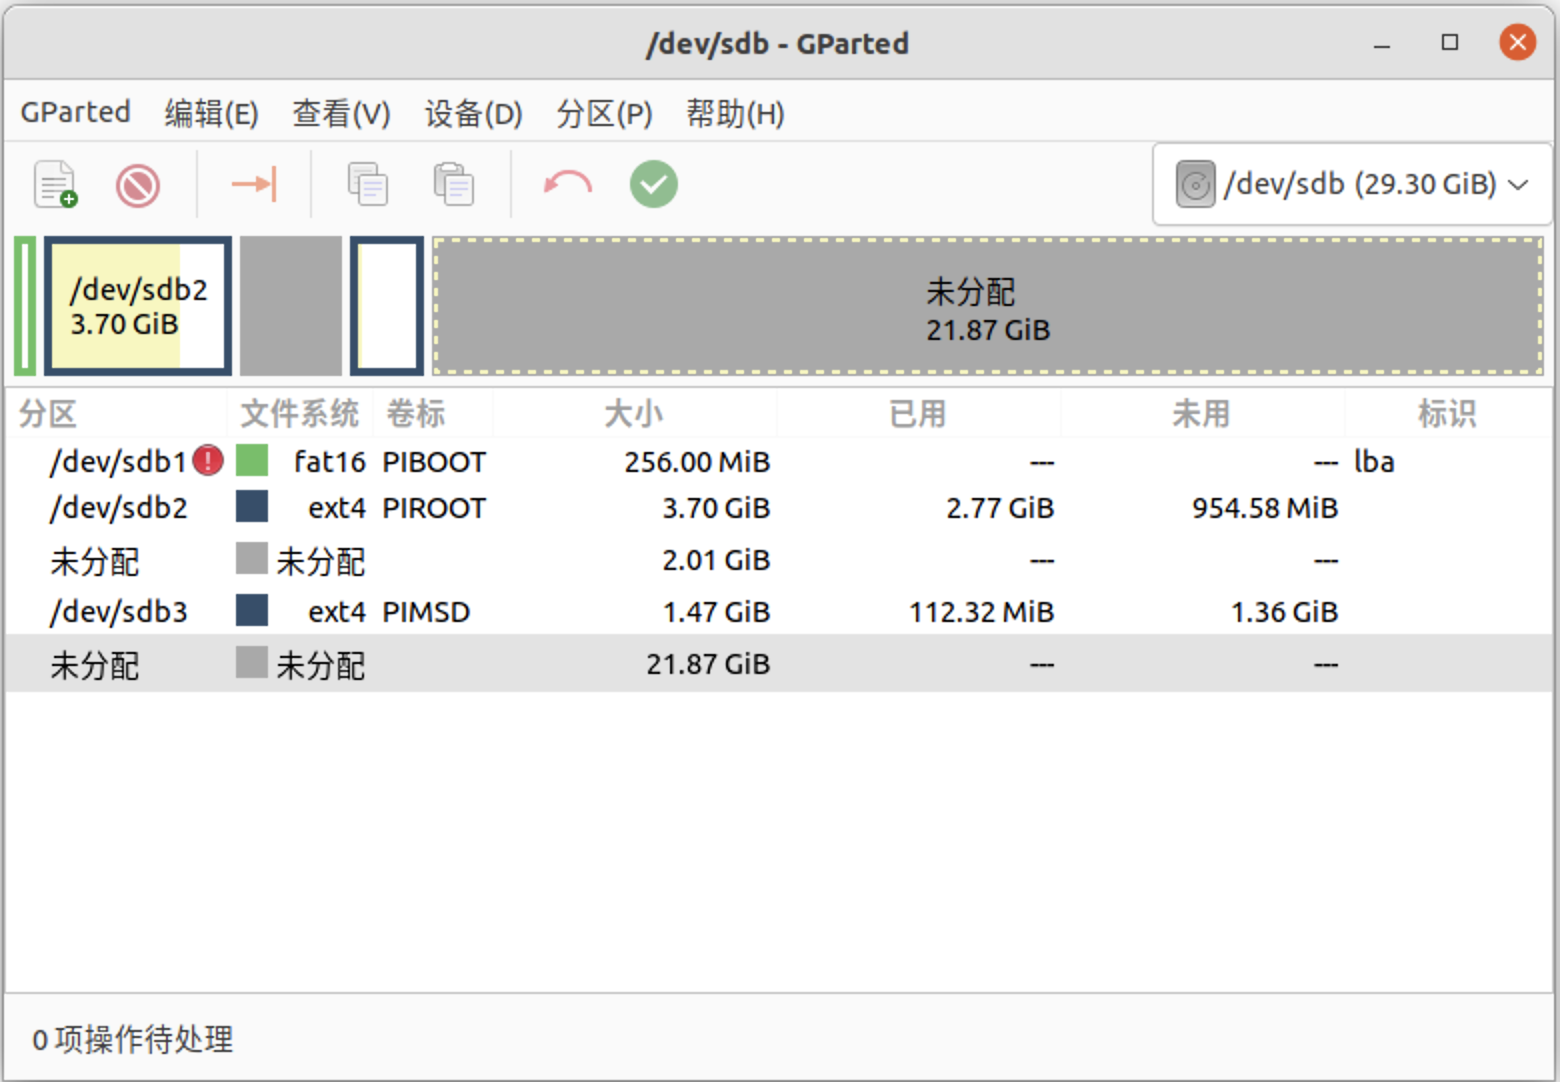
2. By observing the partition of the SD card in the above figure, we can find that 2.01GB and 21.87GB of space are unused before and after the sdb3 partition, which is the space we want to expand.
Select the sdb3 partition and click Resize.
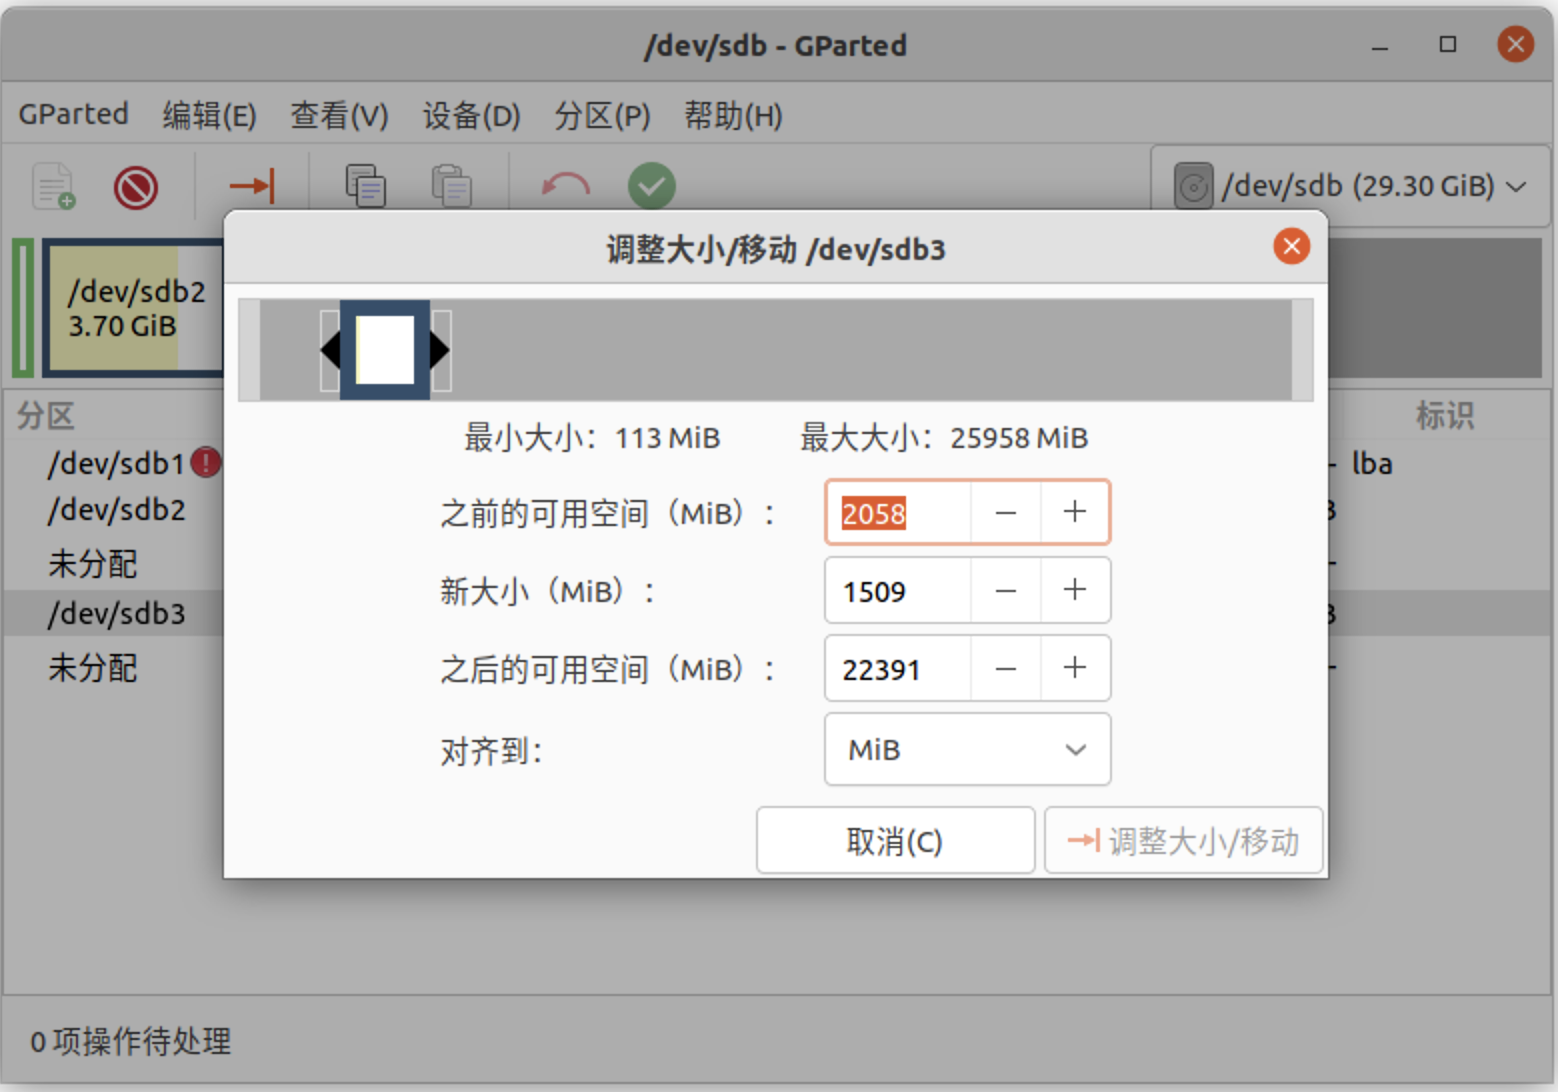
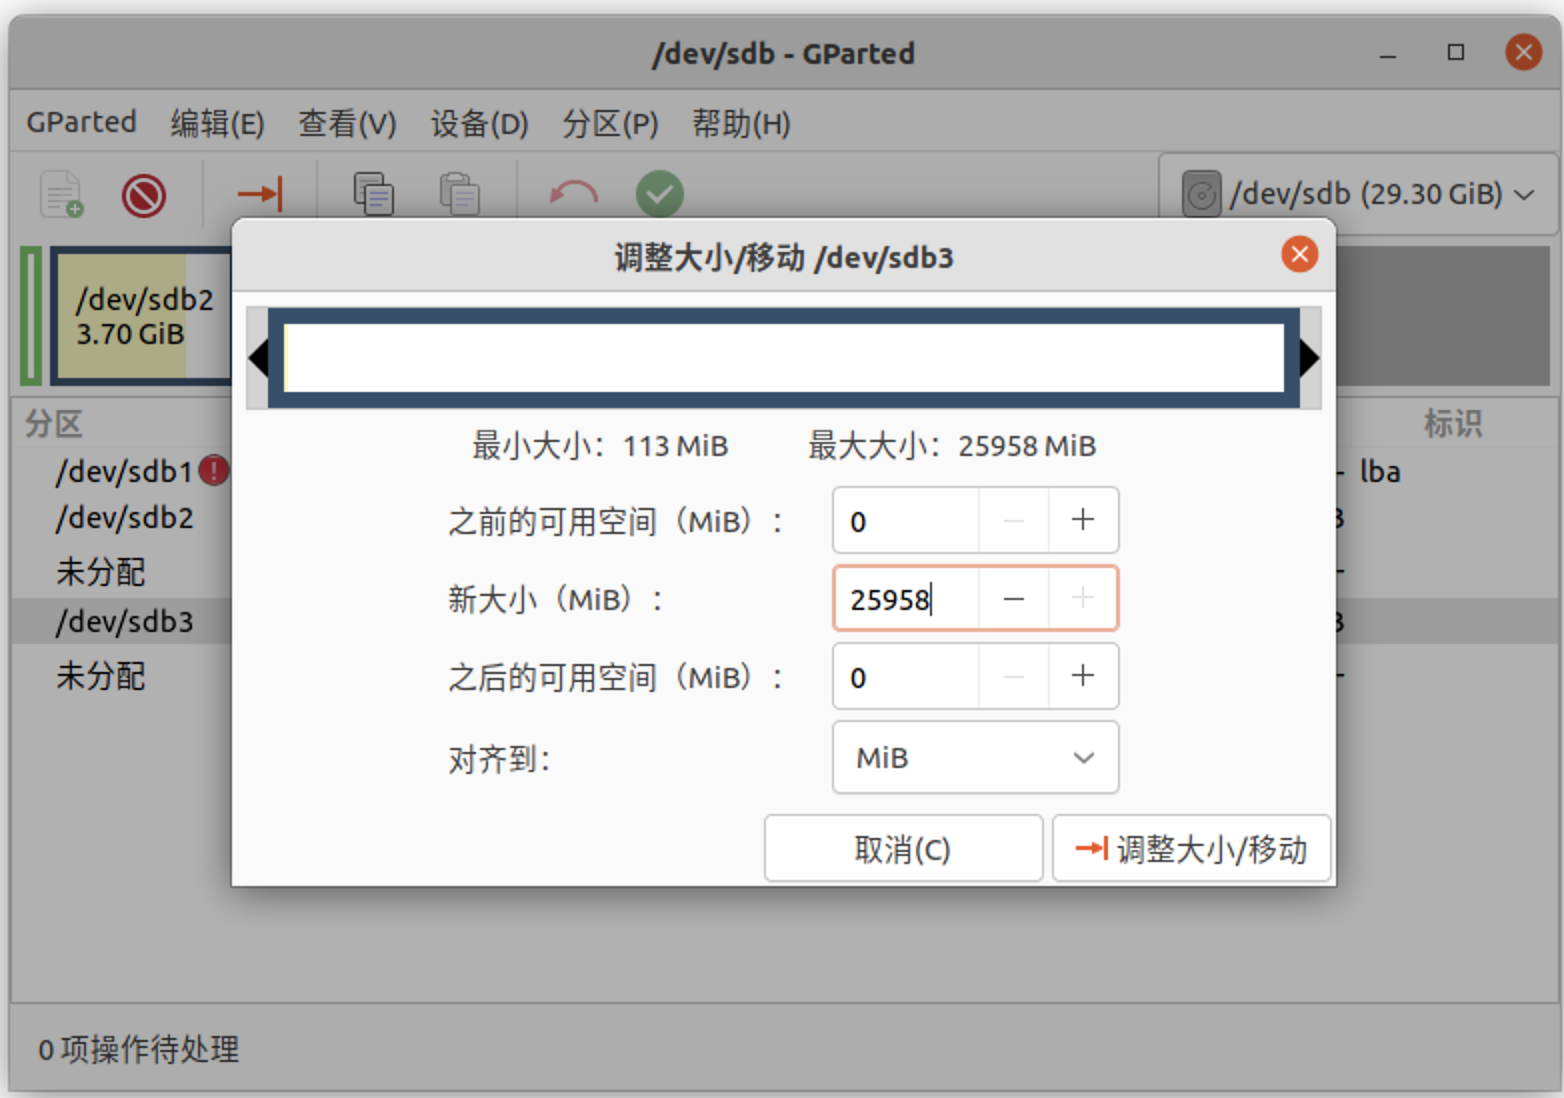
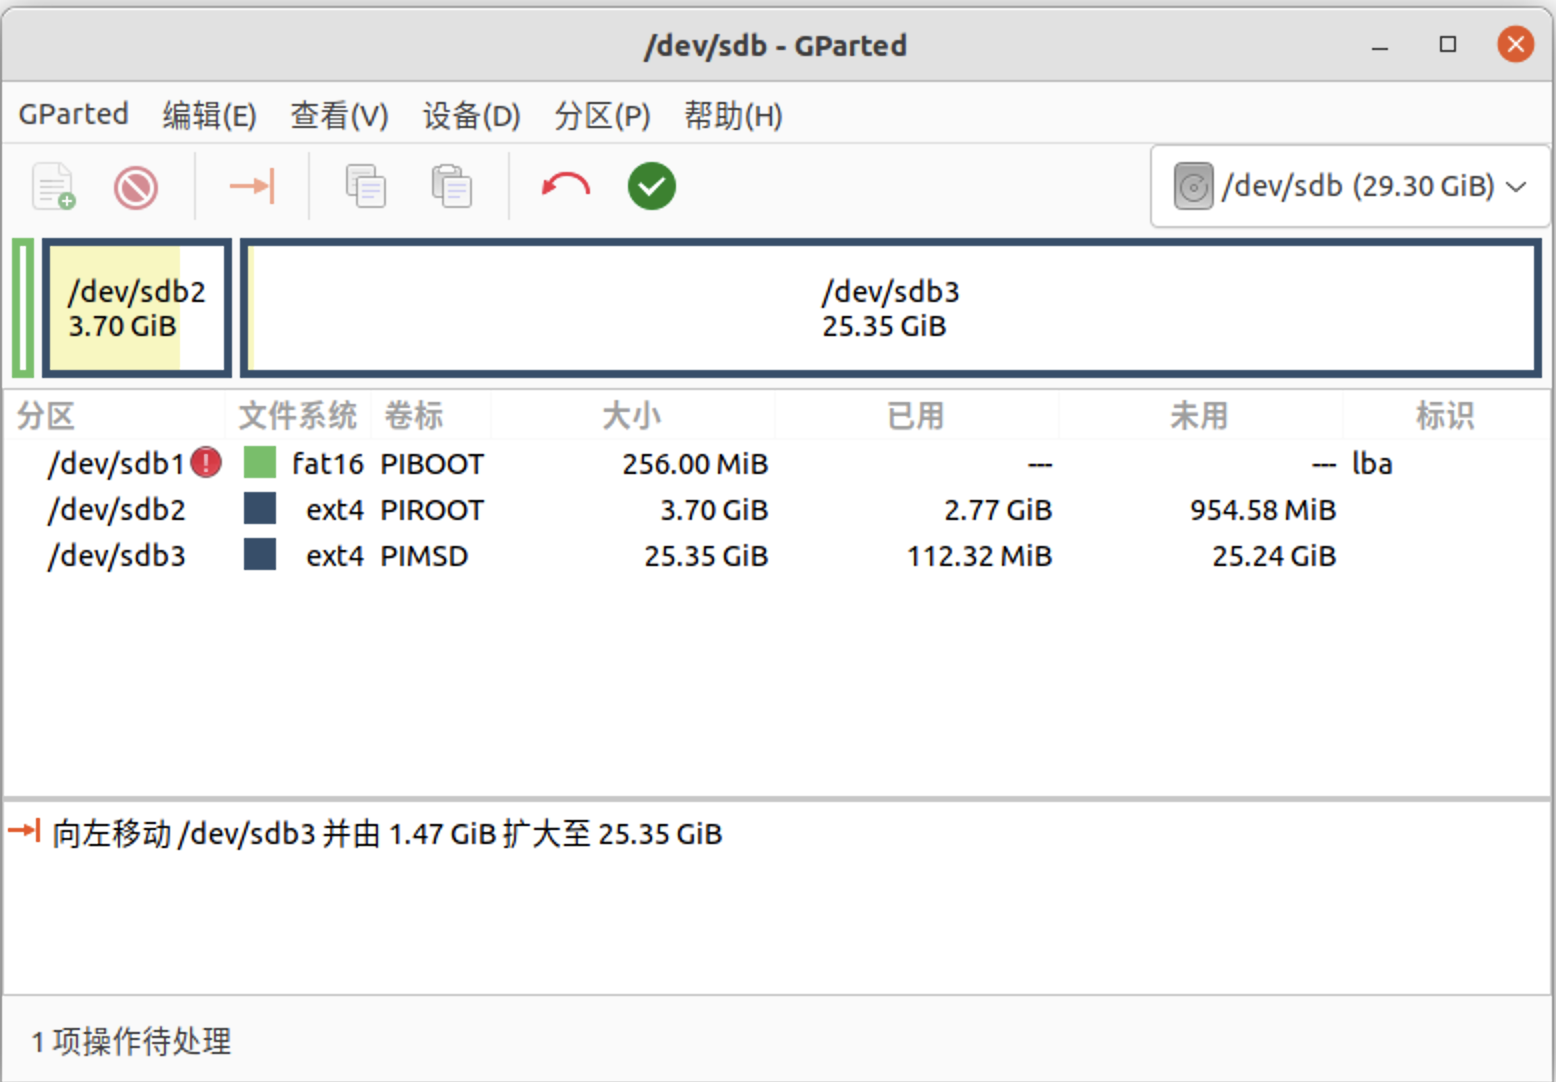
3. You can drag the white partition of sdb3 to the leftmost and rightmost, or fill in 25958 with "Previous Free Space" as "0" and "New Size" as "Maximum Size", and then click Resize in the lower right corner. Then click OK to see that all unused space of sd has been used.
4. Insert the SD card into the device and start it.
Method 3: Use script
- If you are using a BliKVM image, you can run the following script on KVM to automatically expand the space.
1. Log in to the KVM terminal, confirm that the system has read and write permissions, run vim expand.sh on any path, and write the following content to expand.sh.
If your hardware is v1,v2 or v3, use:
#!/bin/bash
set -x

resize_mmcblk0p3() {
  echo "Resizing mmcblk0p3 partition..."
  parted /dev/mmcblk0 resizepart 3 100%
  resize2fs /dev/mmcblk0p3
  echo "mmcblk0p3 partition resized successfully."
}

echo "Starting partition resizing..."

resize_mmcblk0p3

echo "Partition resizing completed."
If your hardware is v4, use:
#!/bin/bash
set -x

resize_mmcblk0p1() {
  echo "Resizing mmcblk0p1 partition..."
  parted /dev/mmcblk0 resizepart 1 100%
  resize2fs /dev/mmcblk0p1
  echo "mmcblk0p1 partition resized successfully."
}

echo "Starting partition resizing..."

resize_mmcblk0p1
echo "Partition resizing completed."
If you are using a PiKVM image, you can run the script below on the KVM to automatically expand the space.
1. Log in to the KVM terminal, confirm that the system has read and write permissions, run vim expand.sh on any path, and write the following content to expand.sh
#!/bin/bash
set -x
        if grep -q 'X-kvmd\.otgmsd' /etc/fstab; then
                part=$(grep 'X-kvmd\.otgmsd' /etc/fstab | awk '{print $1}')
                # shellcheck disable=SC2206
                splitted=(${part//=/ })
                if [ "${splitted[0]}" == LABEL ]; then
                        label=${splitted[1]}
                        part=$(blkid -c /dev/null -L "$label")
                else
                        label=PIMSD
                fi
                unset splitted
                disk=/dev/$(lsblk -no pkname "$part")
                npart=$(cat "/sys/class/block/${part//\/dev\//}/partition")
                umount "$part"
                parted "$disk" -a optimal -s resizepart "$npart" 100%
                yes | mkfs.ext4 -L "$label" -F -m 0 "$part"
                mount "$part"
                unset disk part npart label
        fi
2. Execute bash expand.sh on the terminal and wait for the execution to complete.
Created: October 29, 2022