Mass Storage Drive
Reinstall the system Video
BliKVM's USB device simulation feature allows you to remotely mount images on the virtual machine's mass storage drive, making it easy to install or reinstall operating systems and other software. This can be a useful feature for system administrators who need to manage multiple virtual machines remotely. By mounting an image on the mass storage drive, you can quickly and easily set up or configure a new virtual machine without having to physically connect a USB drive or other external storage device.
Note: the size of the MSD is limited by the size of your sd card or eMMC module.
Web UI
The entrance to the MSD virtual USB drive is as follows:
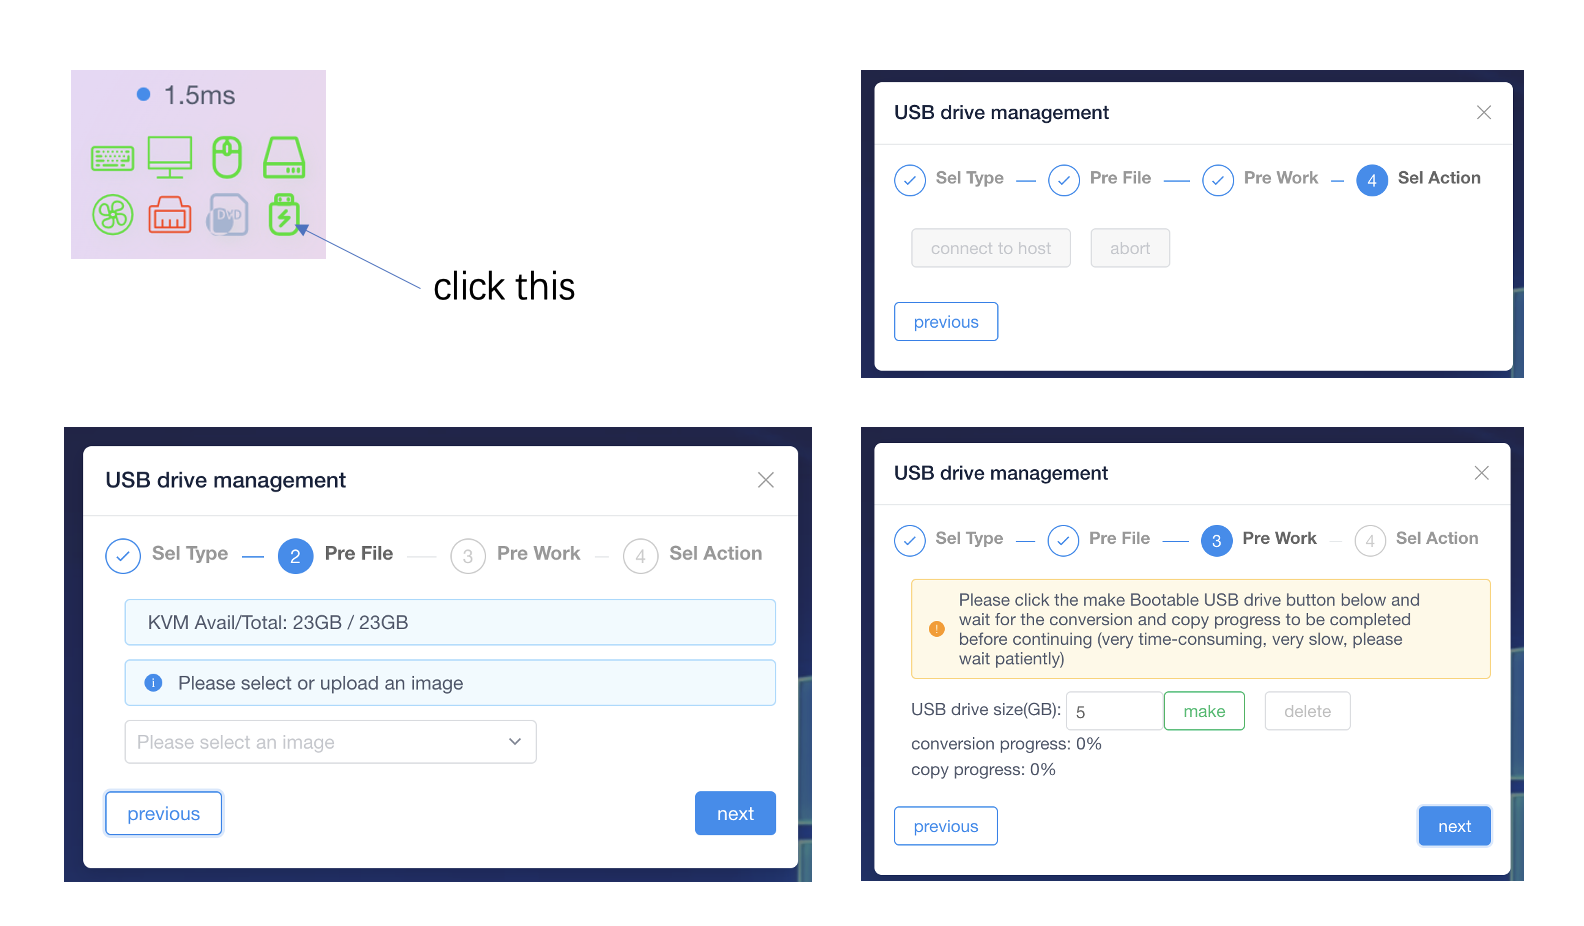
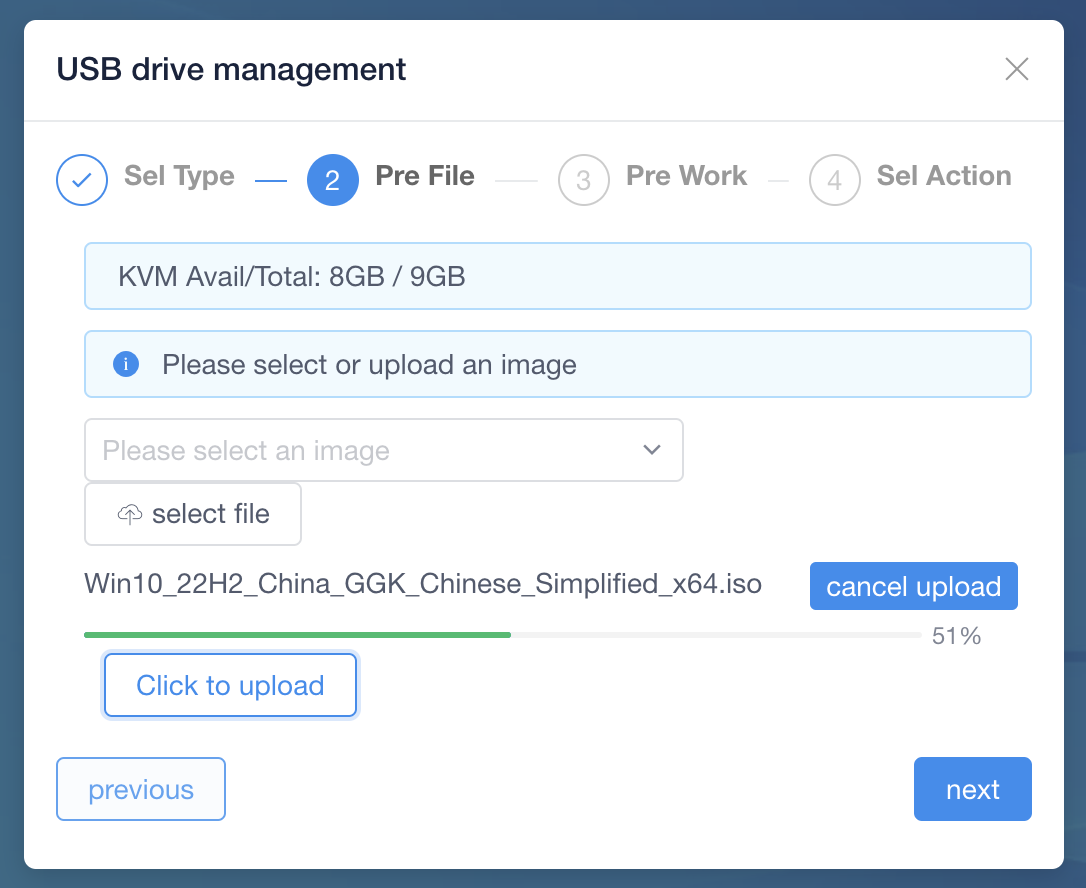
Using the web to upload images and create bootable drives are both synchronous processes. If you exit the MSD UI interface after uploading an image, you can resume the upload from where it left off the next time you select the same image. However, once you exit the bootable drive creation process, you cannot resume it; you will need to start over.
- The default upload path for images is /mnt/upload. If an upload fails, you can manually delete the cache files that were not successfully uploaded.
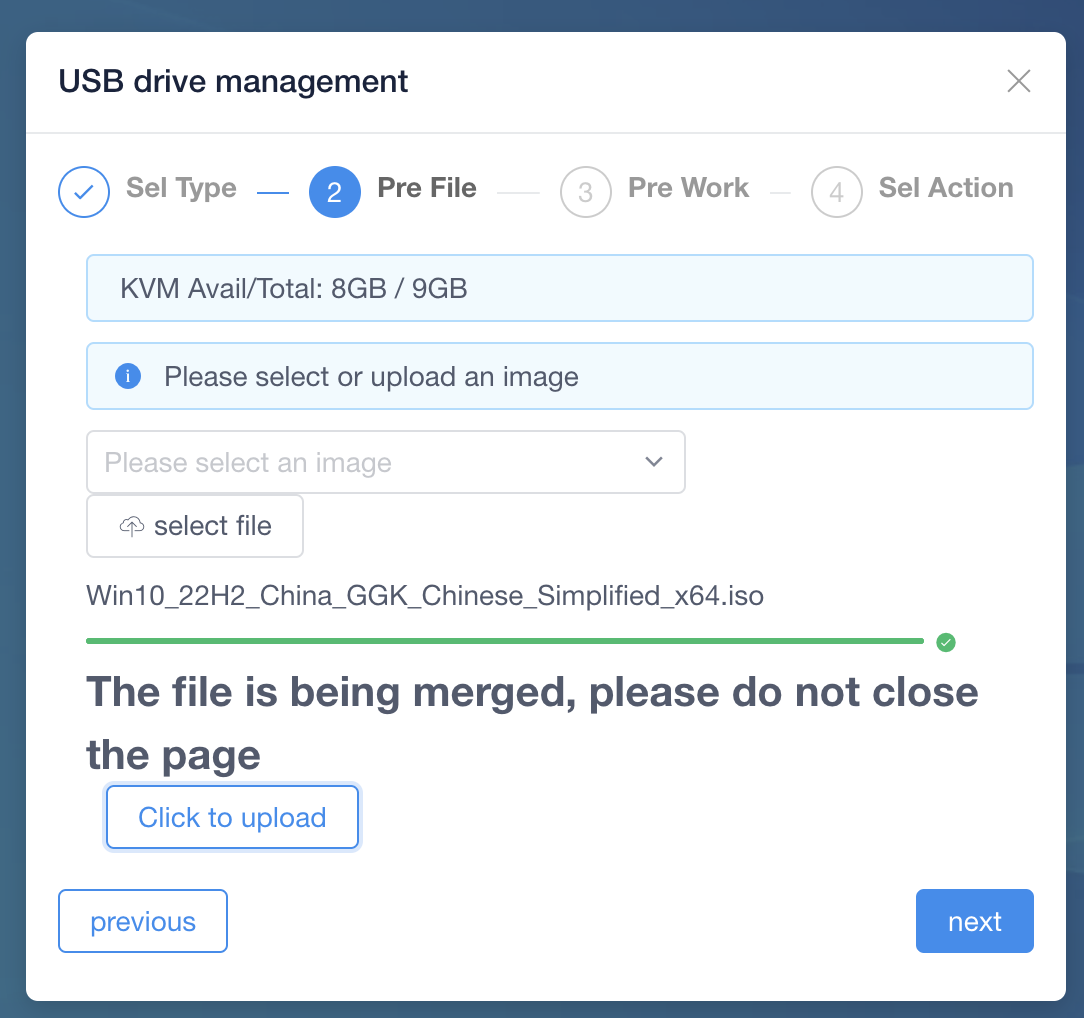
- Due to the large size of some image files, image uploads are divided into slices and then merged. The merging process cannot be resumed, so please ensure you wait for the merge to complete (which may take some time) before proceeding to the next step.
- Creating a bootable drive involves two steps: creating a virtual USB drive and copying the selected ISO image into the created virtual USB drive. Both steps have progress indicators. Please wait until both steps show 100% progress before clicking the next button.
Upload images manually (without Web UI)
-
Confirm that the following four paths exist. If you are using the official latest image of blikvm, and it is fully configured, there is no need to check.
-
SSH logs in to blikvm, executes the rw command, and changes the system permission to writable.
-
In your PC ,use scp cmd send iso file to kvm board.
-
excute msd cmd.wait until excute end.
- If you don't use option paramter:
- The default size of the USB flash disk is 5GB.
- The default filename is scan /mnt/msd/user dir.
- The default msd name is ventoy.
- If your iso is large than 5GB.You can specify the optional parameter - s xxx, xxx is the Size.
- If you need specify iso ,you can use -f xxx.iso.
- If you want to specify the msd name, you can use -n xxx.
-
Tips: cp progress slowly, Please be patient.
-
If you want to excute other cmd, you can use other option. c option contains : make/conn/disconn/clean
-
connect msd
-
disconnect msd
-
clean msd
-
throuht web restart PC, enter BIOS, modify boot priority,set blikvm USB first.
-
according to step, select operate system , format partition and install system.
Created: April 17, 2023