BliKVM v4 Allwinner
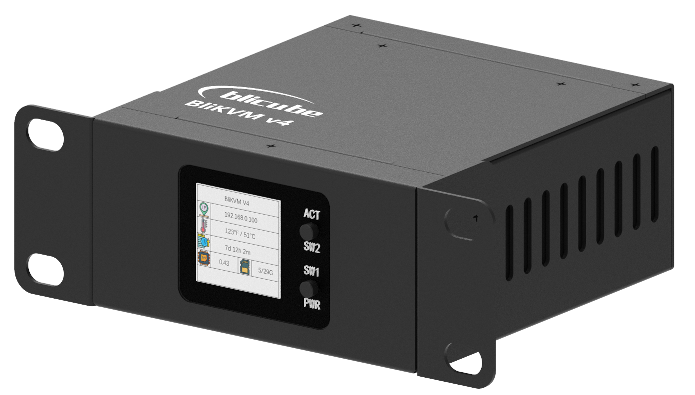
BliKVM v4 is a production-ready, plug and play KVM-over-IP device that offers professional users a convenient solution for remote server or workstation management. It is based on Linux and fully open source. With BliKVM, you can easily power on/off, restart your computer, configure UEFI/BIOS settings, and perform OS reinstallation using an emulated Mass Storage Device. BliKVM simulates a keyboard, mouse, and monitor, all accessible through a web browser, ensuring a seamless user experience. Its hardware-level access guarantees independence from specific remote ports, protocols, or services, making it a highly flexible and reliable remote management solution for professionals!
Craft Computing: Goodbye IPMI - Blicube BliKVM V4 Review
Lawrence Systems: Blicube BliKVM V4: Is This the Best Linux IP KVM Yet?
RainCat: How to install PiKVM on BliKVM v4 Allwinner
Features
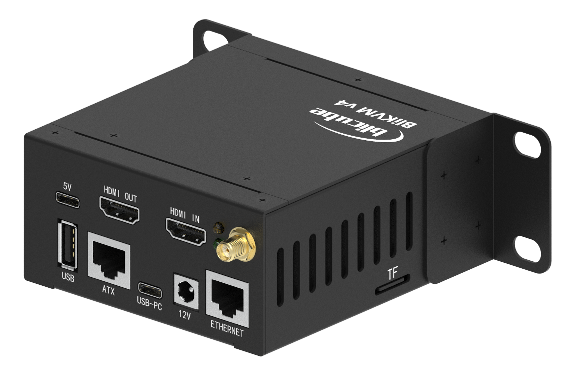
- Video capture (HDMI, support 4K@30Hz input)
- Keyboard forwarding
- Mouse forwarding
- HDMI video loop through
- ATX Control the server power using ATX functions
- Fullscreen mode
- Access via Web UI
- Support multi language switching
- Support PoE & DC
- Support WiFi
- Serial console port
- 1.33 inch color display
- Real Time Clock (RTC)
HDMI input supported resolution types

Installation Requirements
In addition to the v4 kit, you will need the following equipment:
- Power adapter (5V 3A, USB-C port, or 12V 2A DC port). If you plan to use PoE (Power over Ethernet) or if the USB ports on your controlled computers provide sufficient power, a separate power adapter is not required.
- The measured power consumption of the v4 is around 4 watts when using the loop-out and single web access.
- HDMI cables (at least one). If you also need to use the HDMI loop-out interface, you will need two cables.
- Ethernet cable(s) (provide based on your requirements). One cable is required for using the ATX power switch function, and one cable is required for using the Ethernet connection.
- USB-C to USB-A cable (for mouse and keyboard data transmission).
Notice!
Before upgrading, execute the following command, otherwise, after running apt-get update and apt-get upgrade, the image will fail to start.
Solution for v4 Power Supply Issues
The v4 is designed to support multiple power input methods simultaneously, such as the 5V port, USB-PC port, 12V port, and PoE port. When multiple power sources are connected, the v4 will select the port with the highest voltage for power supply. This may result in the controlled PC powering the v4. Since many PCs have limited USB power supply capabilities, you might notice that the v4 is affected when the controlled PC is powered on or off. To prevent this issue, you need to add a USB splitter board to the USB port.
Video Guide: Unpacking and connecting case step by step
Installation Steps
1. Open the v4 kit package and connect the BliKVM to the controlled computer according to the connection diagram shown below:
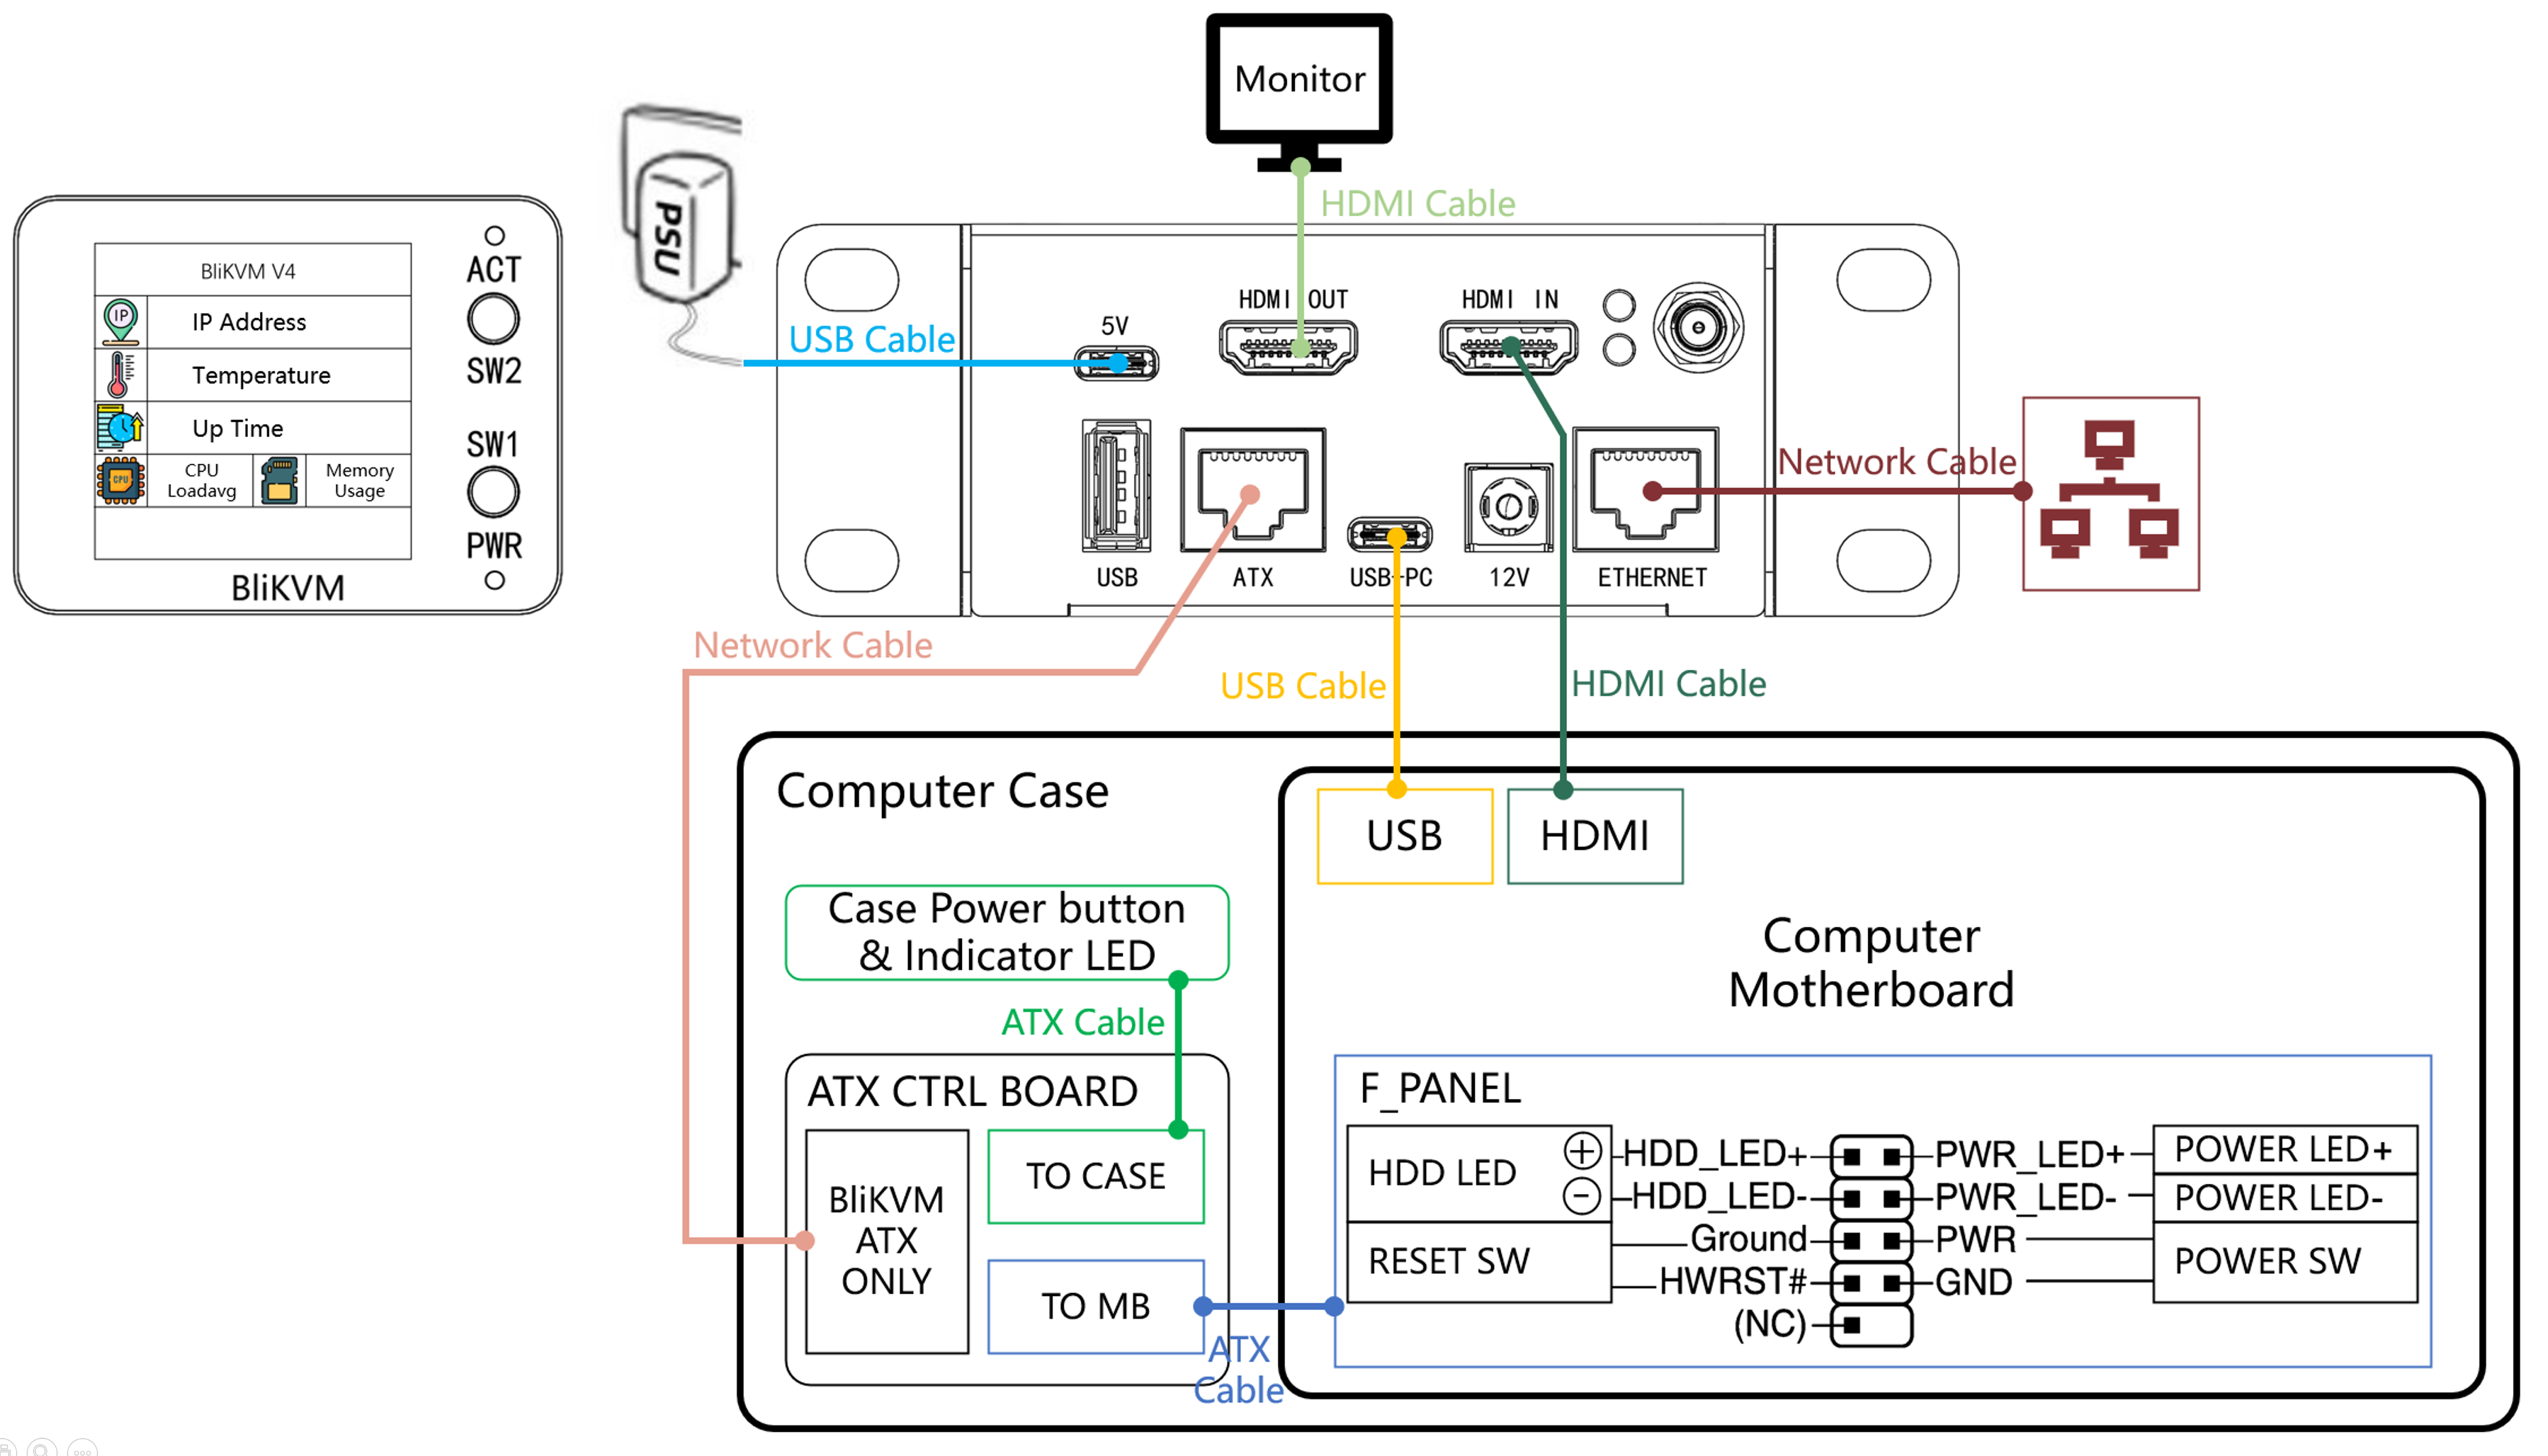
ATX Connection Please refer to the ATX Connection Guide.
2. Once all the cables are connected, power on the BliKVM. Wait until the display shows the interface, indicating that the device has started up successfully.
3. Read the "First Steps" guide carefully. It provides instructions on how to find the device on the network, how to log in, change passwords, and more. Follow the steps described there and then return to this page.
4. Try managing your computer using the BliKVM web interface. Make sure you can see the image and that the keyboard and mouse are working properly. If you encounter any issues, check out our FAQ (it's very helpful). If you find no solution there, seek support in our Discord chat room.
5. You can explore other pages in the wiki to discover more features of BliKVM. Enjoy your experience!
Video Mode
v4 supports a maximum video input of 4K30Hz, and the default transmission resolution is 1920x1080.
The current firmware of v4 provides H.264 software encoding. When using this mode, the CPU usage of v4 will be relatively high, and the latency will be greater than MJPEG under good network conditions. It is recommended to use this mode only when the public network bandwidth is insufficient.
Packing List
| BLIKVM v4 | 1 |
|---|---|
| WiFi Antenna | 1 |
| ATX adapter board | 1 |
| ATX Dupont Cables 8pin Male to Male 60cm | 1 |
| ATX Dupont Cables 8pin Male to Female 60cm | 1 |
| 1U Rack Mounting Ears | 2 |
| M2.5x5 Screws | 8 |
| Silicone Bumper Pellets | 1 |
Serial Console Access via the 5V Port
The 5V port can be used both for power supply and serial console access at the same time. The default baud rate is 115200. There is an onboard CH341-based USB to UART converter present inside BliKVM v4 which is connected to UART0 of the mCore-H616 SoC, so you can connect a USB port of a PC to the 5V port without an external UART and a USB-C to dupont adapter.
PC USB port current output
Be careful when trying to use the 5V port because a PC USB port alone may not be able to provide 3A (5V) which is a documented requirement for the board to work. Either use a 12V 2A DC port at the same time as using the 5V port for serial communication without a USB Splitter board, or use the splitter board to split out the VCC pin and use a separate 5V 3A power supply to provide power to the 5V port's VCC pin. Likewise, when disconnecting a cable from the 12V 2A DC port while BliKVM is powered on, make sure to disconnect the cable from the 5V port first (because that will become the power source for BliKVM v4 after the 12V 2A source is disconnected unless a splitter is used).
You should see something like this in your host kernel log (if you are using a Linux-based OS) when attaching a USB cable to the 5V port of BliKVM v4:
usb 1-1.2: new full-speed USB device number 12 using xhci_hcd
usb 1-1.2: New USB device found, idVendor=1a86, idProduct=7523, bcdDevice=81.34
usb 1-1.2: New USB device strings: Mfr=0, Product=2, SerialNumber=0
usb 1-1.2: Product: USB Serial
ch341 1-1.2:1.0: ch341-uart converter detected
usb 1-1.2: ch341-uart converter now attached to ttyUSB0
Accessing this port can then be done using GNU screen or TIO:
If you need to check how much data is received over UART0 you can do this by looking at the counters exposed via proc as follows (the rx counter should increase when the data is sent from an external host if the built-in USB to UART converter is working properly):
root@mangopimcore:~# grep '0: uart' /proc/tty/driver/serial
0: uart:16550A mmio:0x05000000 irq:284 tx:20306 rx:40 pe:1 RTS|DTR
Dev
If you want to develop or port software on v4 hardware yourself, you can refer to this hardware resource description.
Buy link
Created: July 13, 2023