FAQ & Troubleshooting
As a first step, we recommend carefully reading our documentation. Most steps to successfully set up your BLIKVM are already described there. If you run into any issues you can check this page which will list common errors. If that still doesn't help you you're welcome to raise an issue ticket or join our Discord for further help.
Common questions
Can I connect multiple servers to a single BLIKVM?
Yes, but it requires additional work to set up. See this page.
How can I get the access to PiKVM in my local network over Internet?
If your router has an external IP address, you can use port forwarding to forward port 80 (Web), port 8008 (mjpeg), and port 8188 (webrtc) In all other cases, you can use the excellent free VPN service Tailscale.
Which BLiKVM hardware version should I choose, such as BLiKVM V1 CM4, BLiKVM V2 PCIe, and BLiKVM V3 Hat?
- First, please refer to this page for a comparison of the main parameters of each version.
- V1 and V3 are external solutions, while V2 is an internal chassis solution. If you have a chassis and there is space inside, choosing the V2 PCIe version would be a better option.
- So how do you choose between the external solutions V1 and V3? V1 is based on the CM4 platform, with higher integration and ready-to-use versions available. V3 is based on the Raspberry Pi 4B platform, with all IO ports exposed and greater expandability. Another key difference is that V1 supports up to 1080P60Hz input, while V3 supports up to 1080P50Hz input. Of course, you also need to consider whether you already have a CM4 or 4B, as purchasing the corresponding baseboard would offer better cost-effectiveness.
Can I use BLIKVM for gaming?
No, because:
- For HDMI-CSI bridge, bus bandwidth is not enough to transmit more than 1080p60.
- For HDMI-USB dongle, high latency and low video quality.
- General hardware video capture differs from software streaming and introduces additional latency.
Can BLIKVM do 4K video?
- For HDMI-CSI bridge, no. There is not enough bandwidth in the CSI bus for that much data. 1080p60 will max out the bandwidth.
- For the USB capture devices: technically yes, they will downsample to something smaller to meet the USB 2.0 bandwidth limitations, so the source may be 4k, but the stream will not.
- The 4K real-time video will not fit through the network anyway.
Where does the cursor/video latency come from?
Here is the chain of transferring an image to your browser or VNC client.
Capture device -> Compression -> Network -> Decompression -> Rendering
100-200ms is very, very fast for this. But we are working to speed things up even more.
Does BLIKVM support sound?
BliKVM v1 CM4, v2 PCIe, v3 HAT version supported, v4 Allwinner not support now.
Can I power the Pi via PoE?
Yes! Hat and PCIe version supported.
First steps
What is the default password? How do I change it?
If you use PiKVM, there are two types of accounts: OS and PiKVM (web interface) accounts. The system account blikvm can be used for SSH/UART access and has the password blikvm. The web interface account is called admin and has the password admin. The PiKVM account cannot be used for SSH access and vice versa.
To change passwords, use the following commands (become the root user):
How do I add another user?
If you use PiKVM software, as stated above you need to make 2 accounts, 1 for the shell, the other for the PiKVM Web UI.
If you require additional users for PiKVM UI, you can use the following:
# su -
# rw
# kvmd-htpasswd set <user> # Adds a new user
# kvmd-htpasswd set <user> # Sets the password as long as the user exists
# kvmd-htpasswd del <user> # Removes/deletes a user

To add a shell/terminal account:
# su -
# rw
# adduser <user>
# passwd <user>
Video problems
BLIKVM does not show the video from the computer at all
- If the output of
dmesg | grep tc358743does not show something similar astc358743 found @ ..., then this means that the TC358743 HDMI input bridge is not detected. Verify that the flex flat cable (ffc) is correctly connected. - Double-check that the video capture device is connected correctly. For the CSI bridge, this should be exactly the camera port.
- Some laptops do not output any signal until you switch the output (usually via the FN + and an F5 key on the keyboard).
- Your computer may have turned on sleep mode for the monitor. Move the mouse to turn it off.
- For windows you might need to check for the active signal resolution. To change the active signal resolution you have to go to Settings>System>Display>Advanced display settings>Display adapter properties then, click "List All Models" and choose the one you want. Keep trying different Hz settings.
The video works in the booted OS, but not in the BIOS/UEFI
This problem appears on Intel NUC, GA-H77-DS3H, and some other devices when using a CSI bridge. All you need to do is change the EDID data. This is the information about supported resolutions that the CSI bridge reports to your computer.
Glitchy or wrong BIOS/UEFI resolution
On some motherboards, the BIOS may be displayed at a lower resolution, or with some rendering issues/glitches, specially on newer ASUS ones. Like this:
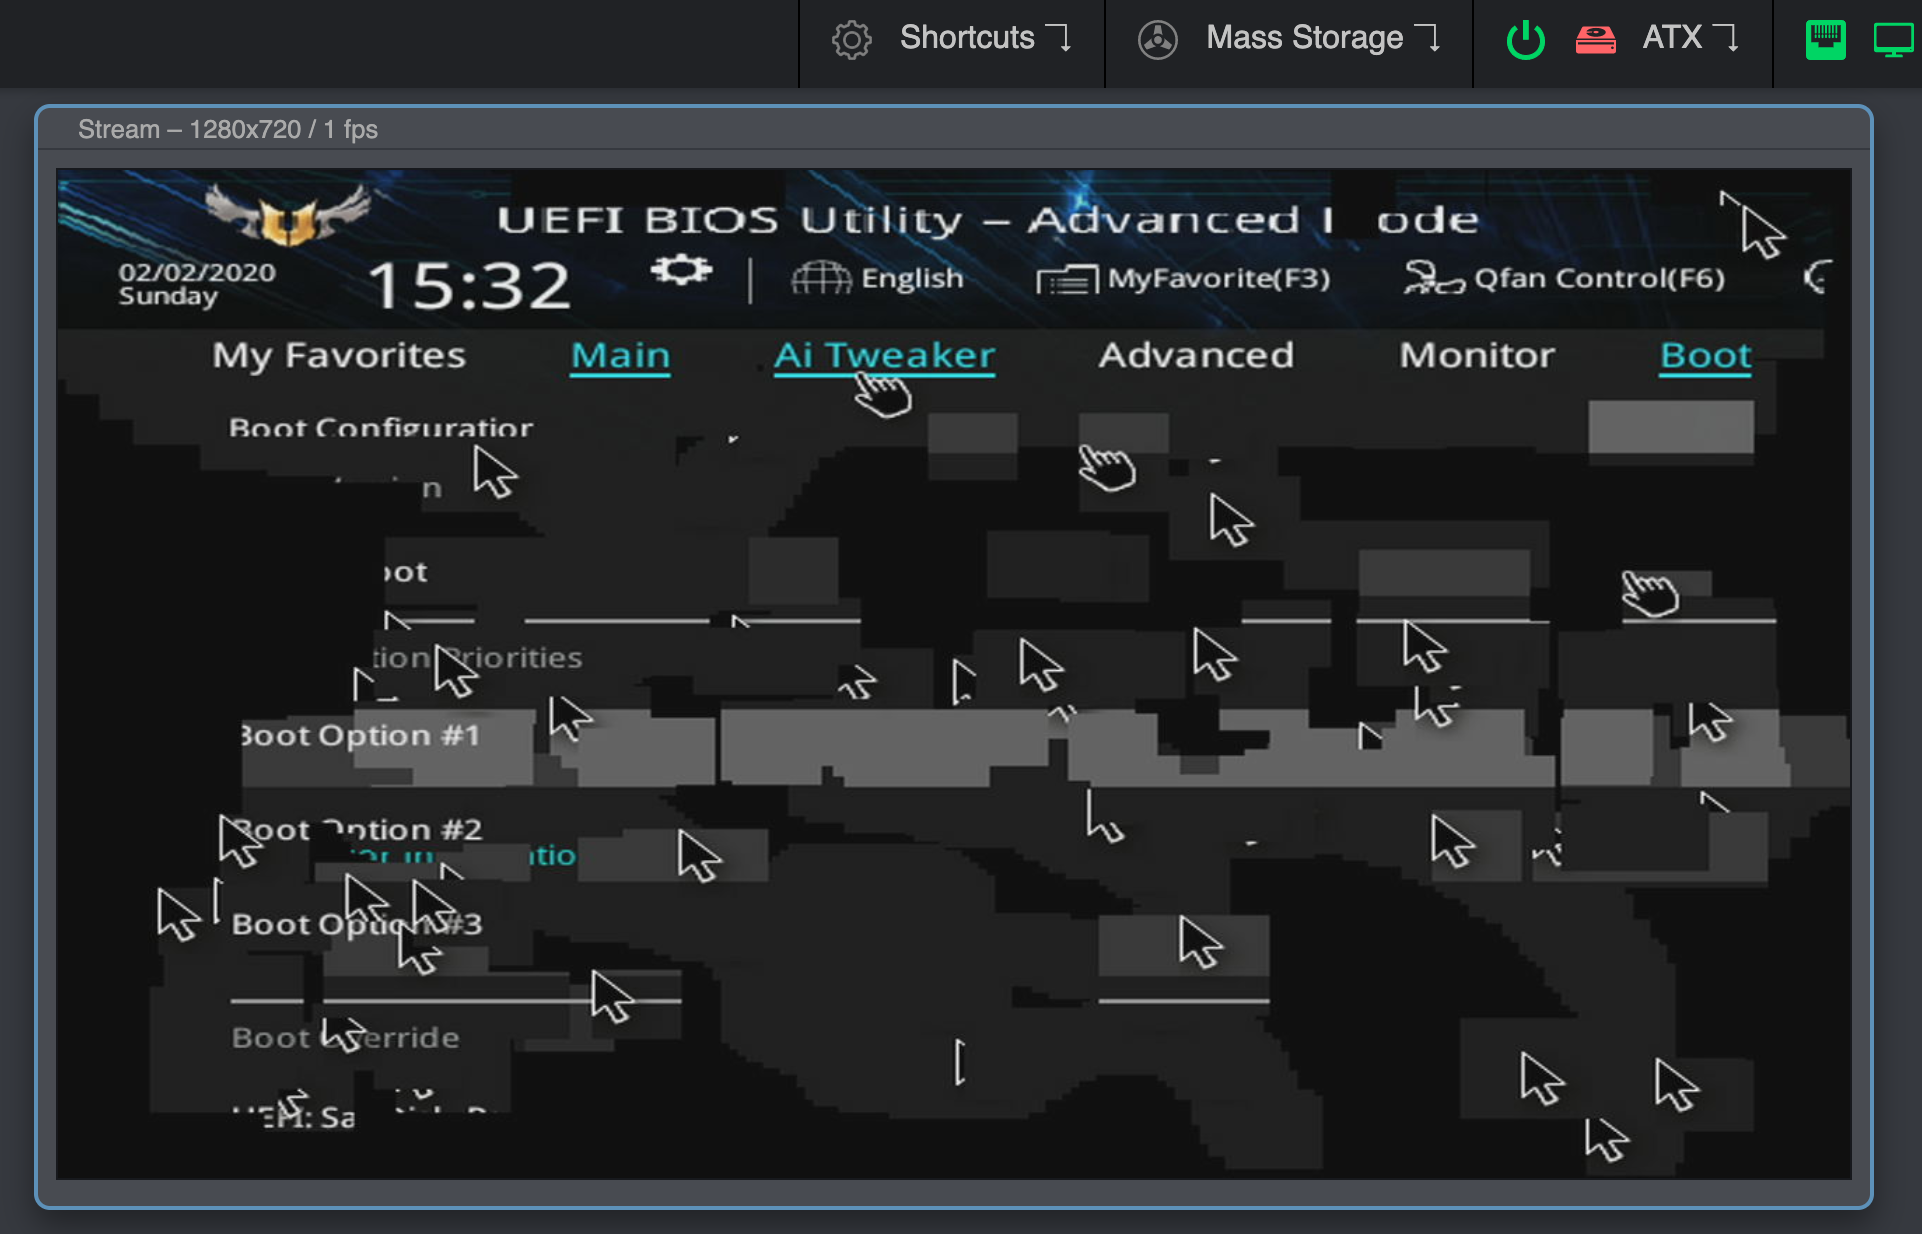
This can be solved by enabling the Compatibility Support Module (CSM) in your BIOS, usually under the Boot options.
If you can't or don't want to enable the CSM, you can try connecting a DisplayPort (DP) monitor, or a dummy plug. If you remove the DP cable/adapter the bug will reappear.
If none of this works, try connecting the DP cable first, boot into the BIOS, disable the CSM and shutdown (do not restart) your PC. Then, boot into the BIOS and enable the CSM before shutting down your PC. Then connect the HDMI and turn your PC on again.
There is no video in GRUB2, but there is before and after
Sometimes this can be caused by the specifics of the BIOS/UEFI and how GRUB2 works with video.
This can be solved by enabling the Compatibility Support Module (CSM) in your BIOS, usually under the Boot options. The video mode will be located in the same section. Switch the Video mode from UEFI to Legacy.
No image from computer with Linux + Awesome WM
Sometimes Awesome WM on Linux can't recognize a video output change on a cable. That is, if the cable was first inserted into the monitor, and then you reconnected it to BLIKVM - it may happen that you will not see the image. It seems that the problem is Awesome WM, since for example with KDE, it is not reproducable. If you turn on your workstation with BLIKVM already connected, everything will work fine.
USB problems (keyboard, mouse, mass storage, etc)
What speed is the USB OTG port?
Per the official RPI documentation, this is a limitation of the SoC. The OTG port is only USB2.0, so is limited to 455 Mbit/s.
Why can't some keyboard shortcuts of physical keyboards be captured while virtual keyboards can? For example, the F11 key on a Mac computer cannot be captured.
This is because some shortcuts are already in use by the system, such as in macOS, where F11 is assigned to the "Show Desktop" function by default. When you press F11 in a web interface, the KeyboardEvent is first captured by the system, and if a callback is registered in the system, the event will not be passed to the application. To solve this issue, you can disable the system's assigned shortcut or use a virtual keyboard.
Hardware problems (Wi-Fi, ATX, etc)
If you use PiKVM software, the web UI show FAN error!
- Because the fan model used by BLIKVM hardware is different from that of PIKVM hardware, viewing the fan status through the web interface may fail in the latest system of pikvm. However, this will not affect the normal operation of BLIKVM fan. Therefore, when using the PIKVM image, as long as you ensure that the install script displays OK, it means that the update of the kvmd fan program is successful. The threshold temperature set by the default program is 60 degrees Celsius. When the CPU temperature is detected to exceed 60 degrees Celsius, the fan will start rotating at 85% speed. If you want to modify the threshold temperature and speed, you can modify the kvmd-fan.py script, and then re-execute install.sh.
I can't connect to Wi-Fi at all!
- If your device is unable to connect to the Wi-Fi network that you have set up, check the 2.4 GHz Wi-Fi channel used by your Wi-Fi access point. If channels 12 to 14 are used (some countries have banned these channels) try to use a channel between 1 and 11.
BLIKVM complains about low power warnings
- Are you using a "proper" power supply? Not one you hacked together?
- Some USB power bricks advertise 5V 2.1A or higher, but can't deliver consistent 5V. Best to use Raspberry Pi Foundation recommended power supplies. It should be 5.1v and 3A DC output.
When I use the PoE, do I still need to use the power OTG splitter to prevent back power on the machine usb?
- Only HAT version you need to use power OTG splitter to prevent back power. Generally, most hosts computer are protected back power, you do not need to usr power OTG splitter in this case.
- BLIKVM-CM4-V2.2 and BLIKVM-PCIe version don't need.
In some board like BLIKVM-PCIe or BLIKVM-CM4-V2.2 has boot pin, how do I connect?
If you short them, CM4 will not start normally, but will enter the burning image mode. If your hardware version of boot has only two pins, use the jumper cap to connect the two pins as a short circuit. If you do not use the jumper cap or plug it into one pin, CM4 will start normally. If you use three boot pins of the hardware version, use the jumper cap to connect GND and another non-GND pin to indicate short circuit, and plug the jumper cap on the two GND pins or do not use it, CM4 will start normally.
Web problems
What ports does BliKVM OS occupy, and how should it be forwarded when using a public server?
- The web interface uses the HTTP protocol and occupies port 80.
- If you are using hardware versions V1, V2, or V3 with web-rtc transmission, the port is 8188.
- If you are using hardware version V4 with MJPEG transmission, the port is 8008.
- Please note that the ports cannot be modified; only port forwarding can be configured.
Raspberry problem
Can I use both the CM4 version with EMMC and the SD card at the same time?
No, you can't, When designing the CM4 hardware, several pins of the SD card are only valid in the lite version. You can find instructions on the official website of Raspberry Pi.
Created: January 19, 2023